Making your products more accessible not only improves your conversion rate, but encourages returning customers.
Afterpay is one of the fastest growing payment methods which all eCommerce store owners should be harnessing in 2019.
What is Afterpay?
Afterpay is similar to Layby, however unlike the traditional process of reserving a product with a deposit and paying installments to complete the purchase; Aftrepay allows customers to get the product upfront and pay-off the outstanding balance over 8 weeks.
Using Afterpay in-store requires customers to make the first payment installment upfront, however online purchases can be purchased without an upfront payment.
Afterpay’s customer accounts are linked to a credit card or bank account so auto-withdrawl is automatic and stress-free.
How Does Afterpay Benefit Online Stores?
In general, Afterpay opens endless possibilities of increased sales and new customers with flexible (and more affordable) payment options.
Afterpay not only offers zero fraud or credit risk, it assumes all end-customer non-payment risk for every single transaction.
How to Add AfterPay to WooCommerce
Step 1: Download Afterpay Gateway for WooCommerce
Head over to the WordPress respository and download the official Afterpay plugin – click here.

Step 2: Install and Activate the Plugin
Upload the plugin to your server via FTP, or if you have downloaded the plugin via WordPress’s Plugins > Add New screen, click download.

Once downloaded into your site Plugins, click the Activate button to enable it.

Step 3: Configure Afterpay Settings
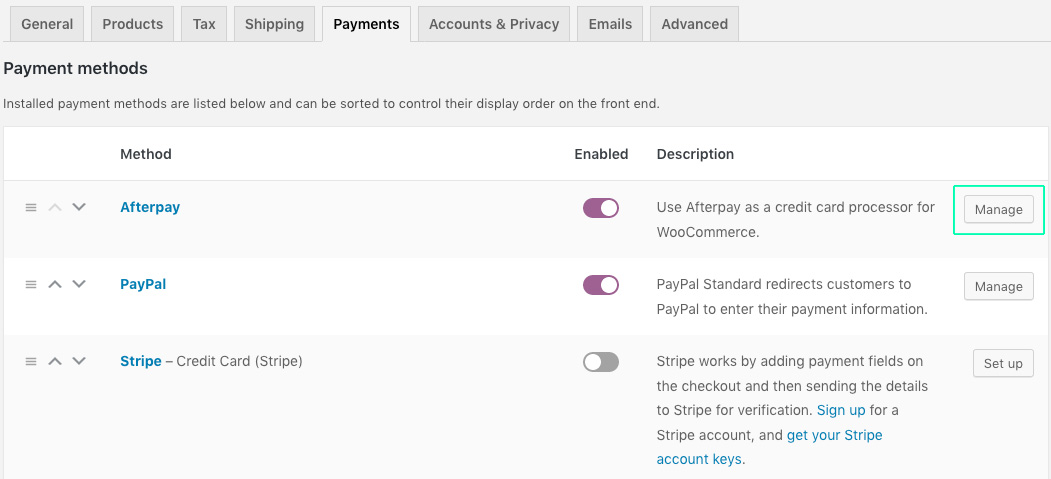
Navigate to WooCommerce > Settings > Payments
Underneath Payments, ensure Afterpay is Enabled and click Manage on the Afterpay payment method.
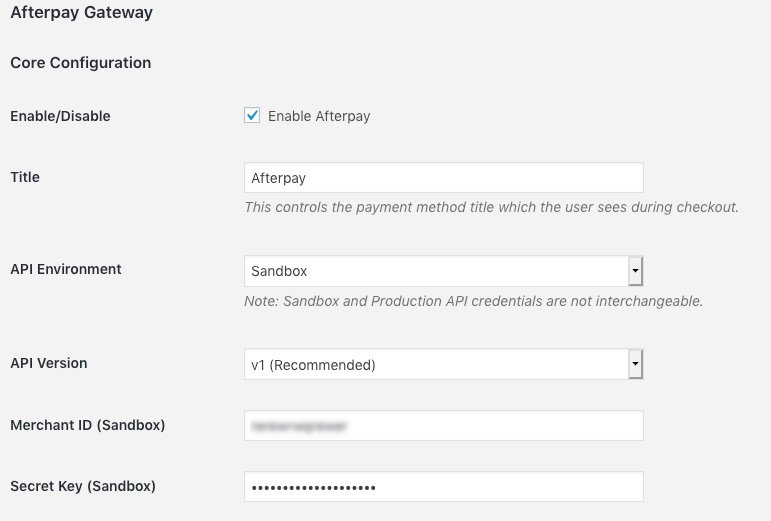
Step 4: Enter Merchant Information
Enter your Merchant ID and Secret Key that were provided to you by Afterpay for production use.
To test the Afterpay checkout process, enter the Sandbox Merchant ID and Sandbox Secret Key. This is highly recommended before launching the payment gateway to the public.
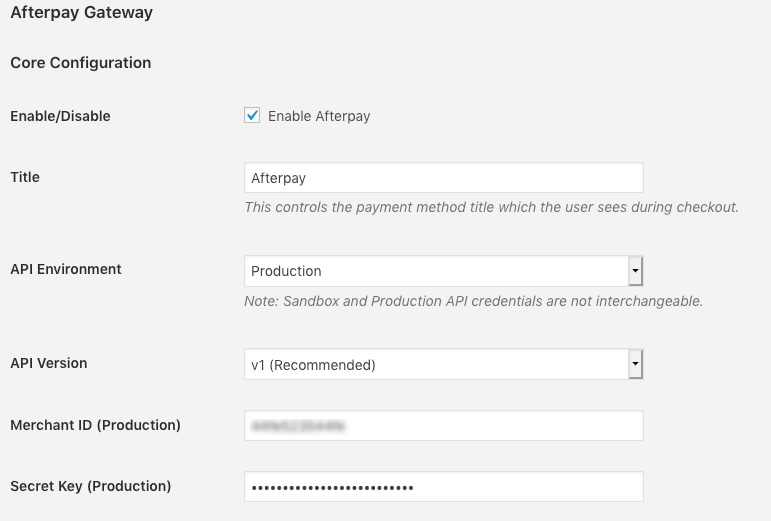
Once you have tested Afterpay in Sandbox mode (test mode), change the API environment dropdown to Production.
You will also need to input the Merchant ID (Production) and Secret Key (Production) information.
Once finished, click the Save button and you’re done!
Need assistance with integrating a buy now pay later provider with your online store? Speak with our eCommerce developers today.